Showing posts with label Chocolate. Show all posts

February 11, 2021

Molten Lava Cake


Recently, my friend's son turned 18 and he sent her a recipe he wanted for his cake, and she forwarded it to me and put me in charge of the cake. It was a molten lava cake recipe.  

Well, back in the day, 19 years ago BC (before children), I used to make a lot of molten lava cakes.  It was one of John's favorites, so I would try different recipes and make them. I have a recipe binder that I use to keep only recipes that I have made and liked.  So, when my friend texted me this recipe I went to my recipe binder to compare recipes.  I found two molten lava cake recipes that I had made before, but I wasn't sure which was better.  Well, I just decided to make all three and only keep the best recipe book in my binder, and record the best recipe here.  Then, lo, and behold, while typing this I went searching through my blog and I found another molten lava cake I have blogged about before and I said that one was my favorite.  I guess I have to make that one again too.  I mean, what's a girl to do??

If you know me, and you've been around here on my blog, you know I love me a good recipe using a ramekin.  Fun fact - I would often give ramekins as shower or wedding gifts with my favorite recipes to use them for.  

Here are a few fun ramekin uses from past blog posts.  The pictures will take you to the posts.  I often use my ramekins for dips as well.  I have these cute heart shaped ramekins that I love using too!


This was the Molten Lava cake I discovered on my blog today. 
It is a Paula Dean Recipe you can find HERE.
I said it was good, but now I have to compare it to the other. 


Not even kidding, I've had many people ask me what a ramekin is. Let me help those that don't know... These are the standard, basic ramekins. They come in other colors as well, and in multiple sizes.


 I am in love with these!!!!


 Oh my word, I love these too!!


 Oh my goodness, decisions... decisions... In navy?!?!?!


Okay, let's get back to the molten lava cakes!!  

The recipe he sent for his birthday was called: Almost-Famous Molten Chocolate Cake.  Recipe HERE


My review: I decided that it's called an Almost-Famous Molten Chocolate Cake, because it's fine, but not fantastic.  If you like bitter/dark chocolate this recipe is for you. If not, don't make it.  I overbaked it a bit... even if you think it's not done, it actually is.  


I used mini Bundt pans instead of ramekins. The recipe called for hollowing out the cake, and I knew it would be easier to just fill the hole in the Bundt pan with the lava part. 


Here is the next recipe.  This was in my recipe book of recipes I have made before, but I couldn't remember what it tasted like.  You make this recipe in muffin tins, so it's great if you have a crowd to feed.  These are also a bit bitter and if you make them in a cupcake tin, you definitely don't need to cook them for the time it calls for.  I would do nine minutes. 


This was how the cupcake lava cake turned out.  One pan ended up having more lava than this one.  The trick to these is not to overbake them. 


Now for my favorite Molten Lava Cake recipe!  As I mentioned before I have given this recipe with ramekins as gifts.  I think a few years after I gave this to one of John's cousins, she sent me a message saying she made them and they turned out perfect! So, yay! 


Molten Lava Cake Recipe

4 oz. semi-sweet chocolate (The recipe calls for good quality chocolate, I just used chocolate chips.)
1/2 c. unsalted butter
2 eggs
2 egg yolks
1/4 c. all purpose flour
1/4 c. plus 1 T. granulated sugar
1/4 tsp. salt

1. Preheat oven to 375

2. Melt chocolate and butter together slowly, whisking often. (I do this on the stove or in the microwave.  The secret is to do it on low heat or in the microwave in 20 second increments, stir, repeat.) Let cool. (I stick in the fridge while I do the next steps.)

3. In large mixing bowl, whisk the eggs and yolks together.  Add in flour and sugar and mix until just blended. (You want to beat in as little air as possible.)

4. Add cooled chocolate mixture.  Whisk together and do not overmix.  Stir in salt. 

5. Butter and flour 4 individual 1/2 cup ramekins. (I didn't flour mine, I just spray non-stick spray)

6. Cook in middle rack of the oven for 9 minutes. 

7. Cakes are cooked when surface appears set, cakes jiggle when shaken, and a toothpick inserted in the middle comes out coated with thick liquid. 

8. Let stand one minute. Run a knife along the inner wall of the ramekin, cover with a small plate, quickly invert.  I flip mine back over, add ice cream, and serve!  (If you've got cute ramekins, you can serve them in the ramekin as well!)


Just add ice cream and enjoy!  If you want to make it like the Chili's recipe you can add magic shell over the ice cream!  Delish! 


Enjoy!

March 19, 2020

Home School Home Economics - Day 1


Monday started my kids being home from school because of the Corona Virus social distancing. I let them have electronics or basically whatever they wanted that day.  That got old real fast, and I decided I had to get my butt in gear to keep my kids off the couch, off the phone, Xbox, and TV. Yesterday, among other things, we did Home Ec.  I had some granola that my sister made me from a little while ago, and thought it would be easy to show them how to make their own granola bars (and to finish off the granola).

You can find my recipe HERE, as well as a recipe for my home made granola.  Super easy, add whatever you have on hand, and enjoy!

December 30, 2019

Hello Dolly Cookies


My mom made these cookies when I was growing up.  This summer, I had a random craving for them and pulled out the recipe I wrote down as teenager.  This is how dated the recipe is -  it called for margarine.  (I just sub all old recipes that called for margarine with butter.) This is a super yummy and super easy recipe. 

This is the original recipe below in my ugly teenage handwriting that would flip flop back and forth from all caps to lower case.  It's not much better to this day. But, this recipe card is one reason why I need to blog or record all of my recipes somewhere... I pull up my blog almost on a daily basis to pull a recipe from because it's so much quicker than looking through my cookbooks or pins. And, I love hearing that my friends and family do it too! Yay! But, also most of my cookbooks and recipe cards are covered with food or ruined with liquid, so it's good to have them in a place where they will be protected from my messy cooking and messy children.


Most Hello Dolly cookies have butterscotch chips in them, but my mom's recipe didn't call for them.  When I was at the store, I saw these salted caramel chips, and thought they would be a yummy addition... and... THEY WERE!  Will always use them in the future - or until they no longer sell them.


Hello Dolly Cookies Recipe

1/2 c. melted butter
2 c. graham cracker crumbs (I make mine in a mini food processor)
1 c. semi-sweet chocolate chips
1 c. caramel chips
1 c. grated coconut
1 can of sweetened condensed milk


1.  Melt butter and mix with graham crackers.  Press into 9x9 square pan.

2.  Sprinkle pecans, chocolate chips, caramel chips over top of the crust.

3. Sprinkle coconut over the top.  Pour sweetened condensed milk over the top, covering evenly.

4.  Bake at 350° for 30 minutes.  To cut perfect squares, wait for them to be cooled.

November 4, 2014

Homemade Chocolate Covered Cinnamon Bears

One of the things I miss about Utah is the availability of Chocolate covered cinnamon bears! It's the little things...

I have found in the gourmet food section at Tj Maxx, Marshalls, and Ross that they have cinnamon bears sometimes.  So, I was craving them this summer and decided to make some when I saw these cinnamon bears at Ross!


We melted some milk chocolate and used toothpicks in the back of the bears to dip and then tap the excess chocolate off. It took some practice to get them off the toothpicks and onto the wax paper just right without making a mess.


We eventually got really lazy and didn't care about making them pretty.  I won't admit to the amount of these that I consumed in one sitting either... But it was a lot...

January 22, 2014

Options for my new favorite cookie recipe!!

Remember how I found my new favorite cookie recipe? Well, I can't stop experimenting with it! Here are some of the different options I have come up with.

 Recipe HERE.

Option A:  I made some mint frosting and filled the centers then drizzled semi-sweet chocolate over top.  DELISH!


Pin It


Option B:  I filled the center with mint filling, then dipped the top into chocolate, so you have a yummy minty surprise inside!  (I took this picture before the chocolate hardened)


Option C:  This was yummy!  They would look perfect drizzled with white chocolate, but I didn't have any when I made them!


I melted these and filled the centers with it. YUM!!  You could do the same with regular Andes mints as well. 

Option D and E:  The original recipe calls for the cookie to be rolled into pecans.  You can omit that or you can just place one whole pecan on the top before drizzling with chocolate. 


The options truly are unlimited!!!! 

October 22, 2013

Crepes with Chocolate Mousse


During my sister's pink birthday weekend, for breakfast one morning we had crepes.  Inspired by the gourmet crepes at the restaurant, Baker's Crust, we had loaded crepes with Nutella, chocolate mousse, strawberries, bananas, toasted coconut, toasted almonds, vanilla creme sauce, and whipping cream.

The chocolate mousse recipe is part of a dessert recipe I've been making for years, but I have no idea where I got it... maybe from Martha??  I mostly make white chocolate mousse (for desserts like THIS or THIS), but I've used all kinds of chocolate to make it.  For crepes I used milk chocolate.  I use it in a lot of things, it's pretty simple and delicious!! You can find the recipe for the crepes HERE. 

Chocolate Mousse Recipe

2 1/2 cups heavy cream
12 oz. milk chocolate (or any kind of chocolate)

1.  Prepare an ice water bath - Fill a large bowl 1/3 way full of cold water and ice.  Set aside
2.  Bring 1 cup of the cream just to a boil in saucepan (or I use a glass bowl and do it in the microwave sometimes)
3.  Place the chocolate in a food processor, with the machine running, pour in hot cream in a slow stream and process until smooth.  (I have actually not used the food processor...  You can just break up the chocolate in smaller pieces and pour the hot cream over and whisk until chocolate is all melted.)
4.  If using food processor, transfer chocolate and cream to a medium bowl.  (Another reason I stopped using the food processor, so I would only have one bowl to clean....)
5.  Set your bowl in the ice water bath.  Let cool, stirring occasionally, until thick enough to hold ribbons on the surface (about 15-20 minutes).
6.  While chocolate is cooling, whip up the remaining cream (1 1/2 cups) until nearly stiff peaks.  If chocolate is not ready to use, refrigerate whipping cream until ready to use. 
7.  Once chocolate is completely cool, fold in the beaten whipped cream.
8.  Cover with plastic wrap and refrigerate until firm - about 4-6 hours.  (I usually do over night)
9.  Enjoy!!  

October 1, 2013

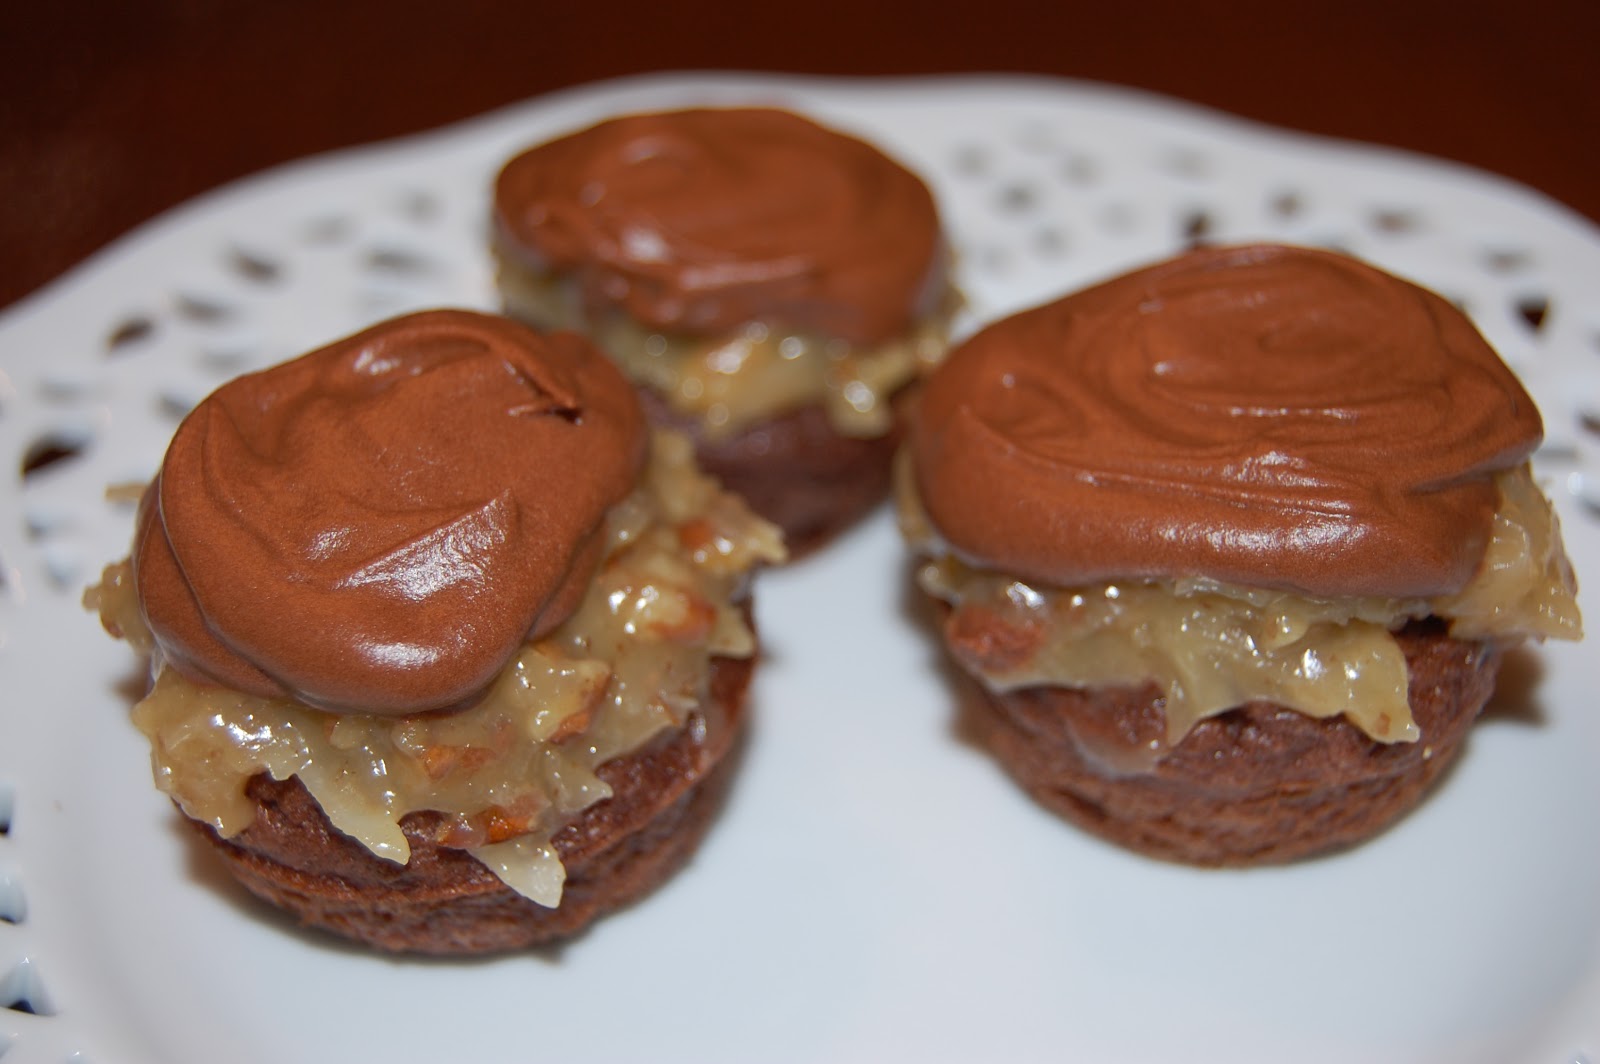
German Chocolate Cupcakes (repost)

I'm craving these today.....  I wish I had time to make them....  My mouth is watering....
 

I've never made German Chocolate Cake or German Chocolate anything, but I've always liked it.  I saw these cupcakes and I had to try them!  They are so good you guys!! 
The only thing is my Grandma's (and most others that I have had) German Chocolate cakes are usually more dense with a little different taste than these cupcakes.  These cupcakes are delicious, but you can still tell that they are made with a box mix even though you add other stuff to the box mix.  Also, the cupcake is so light and fluffy, that it is almost too light and fluffy to hold the layers of frosting.  I made both mini cupcakes and regular sized, and the regular sized were able to hold up to the frostings a lot better. 
I changed how she mixed the ingredients together as well, because I am way too lazy to do the sifting and alternating (unless I am making an angel food cake!).  My cupcakes turned out so fluffy, if they were any fluffier I would have been chewing on air... 
Also, I didn't have evaporated milk for this recipe and after some searching the internet I just made my own! 
I will definitely be making these again!

German Chocolate Cupcake Recipe
Recipe from HERE
Chocolate Cake:
1 box Devil’s Food Cake Mix
3 eggs
½ cup oil
1 teaspoon vanilla extract
¾ cup buttermilk
1 cup sour cream
German Chocolate Frosting:
1 cup evaporated milk
1 cup sugar
3 egg yolk, lightly beaten
1/2 cup butter
1 ½ teaspoon vanilla extract
1 ½ cup chopped pecans
1 ½ cup flaked coconut
Chocolate Buttercream:
4 ounces cream cheese
½ cup butter
2/3 cup unsweetened cocoa
3 cups powdered sugar
2 teaspoons vanilla extract
1 tablespoon milk or cream (if needed)


Directions:

1. Preheat oven to 350 degrees and line two muffin tins with 20-24 cupcake liners.


2. In a large bowl, gently combine oil, eggs and vanilla extract.


3. Add cake mix and buttermilk and mix until combined.


4. Add Buttermilk and stir until combined.

5. Add sour cream and mix.
6. Fill cupcake liners ¾ full and bake for 18-22 minutes or until an inserted knife comes out clean.
7. German Chocolate Frosting: On medium heat in a sauce pan, constantly stir evaporated milk, sugar, egg yolks and butter until thickened. (Basically, until it boils and it will take approximately 15 minutes.) Stir in vanilla extract, pecans and coconut. Let cool.
8. Chocolate Buttercream: Beat cream cheese and butter for 4 minutes. Add cocoa, powdered sugar and vanilla extract. Let beat for 3 minutes. If it is too thick, add milk. If it is too thin, add powdered sugar. Or if it is not dark enough, add more cocoa. This recipe for the buttercream you'll definitely have to play with a little bit.
9. Pipe or spread the German Chocolate Frosting on top of cupcake then spread the buttercream on top of that.  You can see the fancy way she did her frostings HERE.  I didn't feel like piping anything.
10.  Enjoy!! They are so yummy!

August 31, 2013

Sinful Saturday...Copy Cat Snickers Bar

Pin It

I just decided to have a Sinful Saturday theme on my blog.  I'll post new desserts or feature old ones like today.  I'll be posting only the most insanely delicious items that make you gain 10 pounds just by looking at them, and items that you just CAN'T. STOP. EATING.

I'm sorry.  And, you're welcome.

From March 2012

Oh. My. Goodness.  This recipe is sooooo good!  We liked the twix bars, but we think this recipe is way better.  So good!  I'd choose these over a regular old Snickers bar any day!! 

This is a great recipe, and I only made two minor changes to the recipe.  1- this recipe combined the nougat and the nuts, but in a real Snickers bar they are layered, so I layered them.  2 - The caramel calls for whipping cream, but I just used the evaporated milk that was already open from this recipe instead of buying another ingredient.  It turned out great!!

This recipe does take a little time to make, having to wait for the layers to cool.  But, you could make the first part one morning, the next part in the evening, and the other part the next day, so you aren't tied to the kitchen if you don't have the time. 

Copy Cat Snickers Bar Recipe:
Adapted from  HERE

For the Bottom Chocolate Layer:
1¼ cups milk chocolate chips
¼ cup creamy peanut butter

1. Grease a 9×13-inch baking pan. Line with parchment paper (I used aluminum foil), then grease the parchment paper; set aside.

2. Make the Bottom Chocolate Layer: Melt together the chocolate chips and peanut butter in the microwave until completely smooth and melted, stirring every 30 seconds. Pour into the prepared baking dish and, using a spatula, smooth into an even layer. Refrigerate until completely cool and hard, about 30 minutes.

For the Nougat Layer:
4 tablespoons unsalted butter
1 cup granulated sugar
¼ cup evaporated milk
1½ cups marshmallow fluff
¼ cup creamy peanut butter
1 teaspoon vanilla extract
1½ cups salted peanuts, roughly chopped

3. Make the Nougat Layer: Melt the butter in a medium saucepan over medium heat. Add the sugar and evaporated milk, stirring until dissolved, and bring to a boil. Reduce the heat to low and cook for 5 minutes, stirring occasionally. Remove the pan from heat and add the marshmallow fluff, peanut butter, and vanilla extract, stirring until completely smooth. Pour over the bottom chocolate layer. 

4.  Pour chopped peanuts over nougat. Again, refrigerate until completely cool, about 30 minutes.

For the Caramel Layer:
14 ounces caramels, unwrapped
¼ cup evaporated milk

5. Make the Caramel Layer: Combine the caramels and the evaporated milk in a small saucepan over low heat. Melt, stirring occasionally, until smooth. Once completely melted, cook for an additional  minute or two, stirring frequently. Pour the caramel over the nougat layer. Refrigerate until completely cool, about 30 minutes.

For the Top Chocolate Layer:
1¼ cups milk chocolate chips
¼ cup creamy peanut butter


6. Make the Top Chocolate Layer: Melt together the chocolate chips and peanut butter in the microwave until completely smooth and melted, stirring every 30 seconds. Pour over the caramel layer and, using a spatula, smooth into an even layer. Refrigerate until completely cool and set, 30 to 60 minutes.

7. Using the parchment liner, remove the bars from the pan and cut into 32 pieces. You can store these in the refrigerator or at room temperature. The filling is yummiest at room temperature, but the chocolate can get a little melty especially if it is warm.   They are yummy straight out of the fridge too!!!

8.  Enjoy! 


See you at the gym...     :) 

March 8, 2013

Oreo Options

Have you made these Oreos yet? I'm telling you they are so good and always a crowd pleaser!  Well, like the regular Oreo uses different colors of filling, you can do that too with this recipe.  Not only do a different filling, but do different things with the cookie part.

Example 1:

After the cookies finish baking use a small cookie cutter with your preferred shape (St. Patrick's Day is coming soon...) and cut one cookie per sandwich.  Ice the regular cookie and top with the cookie that has been cut out.  Too cute.
Example 2:  What do you do with all those pieces you cut out?  Make mini shape cookies!


To make the above cut out cookies, after I rolled the dough into balls I pressed them down with a glass a little bit to make sure they didn't get too fluffy.

Example 3:  You can also take this dough and roll it out and use a cookie cutter like you would sugar cookies.  Unfortunately, I used a big fat heart cookie cutter that didn't look too well after the cookies rose a little bit in the oven.   But you get the idea...
 

Also, if you compare the below picture to the original picture of my first Oreos I made the below filling look prettier because I piped in a circle and then smashed them together creating this nice pretty finish of the filling (like a real oreo).  So, if you want the filling to look pretty, pipe it.  Either way it's going to taste fabulous!


Oreo recipe found HERE. 

December 1, 2012

Copy Cat Butterfinger Candy Bars


I'm not sure I would call this a Pinterest Fail, but it was pretty close.... I followed the recipe exactly, but some of my candy corn was really old, so I don't know if that mattered or not...  I probably won't try again any time soon to find out either. 

However, the taste was pretty close to copying a Butterfinger candy bar.  To quote my eight year old, "It almost tastes like a Butterfinger, Mom.  You did a pretty good job..." 

Because my mixture didn't turn out quite right, it was really hard to cover in chocolate without getting little pieces of the inside stuck on the outside of the chocolate.

My two year old loved eating my rejects - I mean, they were all rejects, but he loved them. 

Here's the recipe in case you want to try.  Let me know how they turn out for you. 

Copy Cat Butterfinger Candy Bar Recipe:
Recipe from HERE

1 lb. candy corn
16oz jar peanut butter (I used Peter Pan Honey Roasted peanut butter)
16oz pkg. chocolate candy coating

Melt candy corn in microwave on high 1 minute. Stir and continue cooking in 15-second intervals til melted, stirring after each interval. Stir in peanut butter. Spread mixture in an 8x8 pan lined with parchment. Cool completely. Cut into squares. Dip in melted chocolate candy coating. Lay on waxed paper to set.


November 7, 2012

Copy Cat Wendy's Frosty Recipe


I got this recipe for chocolate ice cream from a friend years ago, and almost every time I've made it, someone comments that it tastes like a Wendy's Chocolate Frosty.  It's a bit creamier than a frosty, but the taste is definitely similar.  Enjoy!!
 
Copy Cat Wendy's Chocolate Frosty Recipe
(or Chocolate Ice Cream)
 
1 can sweetened condensed milk
1/3 c. Cocoa Powder
2 c. whipping cream
3/4 c. milk (whatever percentage  you want to use)**
1 T. vanilla
 
1.  In medium sauce pan stir together condensed milk and cocoa.  Cook over low heat, stirring constantly until mixture is smooth and slightly thickened, about 10 minutes.  Remove from heat; cool slightly. 
 
2.  Gradually add whipping cream, half and half, and vanilla beating with a whisk until well blended. 
 
3. Refrigerate until cold.
 
4.  Pour in ice cream maker (according to the directions on your ice cream maker) and it's done when it has reached desired consistency (usually about 25-30 minutes).
 
5.  Serve immediately.  I personally don't think homemade ice cream is as good after it has hardened too much.
 
**  The original recipe called for 1 c. half and half.  I don't often have half and half and just use regular milk, and I don't know why I cut down on the amount either I've been making it so long...  :)


October 18, 2012

Peanut Butter Rice Krispy Thumb Print Cookies


Good luck trying to eat just one of these... I couldn't stop!  You could just make peanut butter rice krispy treats and drizzle chocolate over the top of these, but the cookies are just too cute.  The original cookie uses a Hershey's kiss, but I would rather bite into melted chocolate.  :)  You could also use these for "nests" at Easter time and fill with mini chocolate eggs.   

Peanut Butter Rice Krispy Thumb Print Cookie Recipe
Recipe from HERE
Makes 24 cookies

1/2 cup corn syrup
1/2 cup sugar
1 cup peanut butter
2 cups Rice Krispies
1/2 c. milk chocolate chips

1.  In a heavy large sauce pan, bring to a boil corn syrup and sugar; take off the burner.
 
2.  Add peanut butter and quickly stir until smooth and creamy.
 
3. Add Rice Krispies and stir until completed incorporated with the peanut butter mixture.
 
4.  Using a small to medium sized cookie scoop, scoop mixture onto waxed paper (I don't always use wax paper, the cookies come off any surface easily)  and press down on the middle with your thumb.  (Or immediately press a Hershey's chocolate kiss in the center).
 
5.  Melt chocolate chips, and spoon a tiny bit in the center of each cookie.  Or you could pipe in the chocolate centers as well. 
 
Let cool completely before storing in an air tight container.

March 17, 2012

BYU Mint Brownie Copy Cat Recipe


Here's a perfect recipe for your St. Patty's Day Celebrations! 

These take me back to my BYU days and my occassional breakfast of champions, consisting of:  a mini loaf of wheat bread with honey butter, milk, and a mint brownie!  Weird combo I know, but so delicious! 

I wouldn't say this recipe was exact, but it was pretty close.  The frosting on this wasn't as firm as the original.  So, that needs some tweaking.  I tried to tweak it but I didn't want to add any more powdered sugar than I already had....  next time I'll try something different. 

This wraps up Copy Cat Week. I hope you've gained 20 pounds... Just kidding, I've gained 20 pounds.

Any requests for next months Copy Cat Week?

BYU Mint Brownies Copy Cat Recipe
Recipe from HERE
  • 1 cup butter
  • 1/2 cup cocoa
  • 2 Tbsp. honey
  • 4 eggs
  • 2 c. sugar
  • 1 3/4 c. flour
  • 1 1/2 tsp. baking powder
  • 1/2 tsp. salt
  • 1 c. chopped walnuts {I omitted these}
  • 12 oz. chocolate icing {store bought or combine 2 cups powdered sugar, 1/4 cup butter, softened, 1/4 cup cocoa and 2-4 TBSP milk. Whisk.} (I made this recipe, and just went ahead and put in the 4 T. because I was distracted, so maybe next time I'll do one T at a time...)
Mint Icing
  • 5 Tbsp. butter
  • dash of salt
  • 3 Tbsp. milk (maybe use a tiny bit less...)
  • 1 Tbsp. light corn syrup
  • 2 1/3 cup powdered sugar
  • 1/2 tsp. mint extract {NOT peppermint!!}
  • 2-3 drops green food coloring

Melt butter and mix in cocoa. Allow to cool. Add honey, eggs, sugar, flour, baking powder, and salt. Mix well. Add nuts. Pour batter into a greased 9-by-13 baking pan. Bake at 350 degrees for 25 minutes. Cool 1 hour.  Or put in the freezer like I did.

Prepare mint icing: Soften butter. Add salt, corn syrup, and powdered sugar. Beat until smooth and fluffy. Add mint extract and food coloring. Mix. Add milk gradually until the consistency is a little thinner than cake frosting.
Place cooled brownies in the freezer for about 20 minutes. Then spread Mint icing on top. Return iced brownies to the freezer for about 30 minutes to stiffen the icing. Spread with a thin layer of chocolate icing.

If you want to cut nice squares, place back in the freezer for about 10 minutes before slicing.

Enjoy!!

March 6, 2012

Peanut Butter Swirl Brownies


Remember?  Tuesdays are dedicated to my love affair with Pinterest.  Here's one of the latest recipes I tried that I thought was quite tasty!!!!!  Link to original recipe HERE. 


Peanut Butter Swirl Brownies Recipe
Brownie Mixture
1 Box Brownie Mix (I used Betty Crocker Fudge Brownies)
1/4 c. oil (I had to sub with butter)
1/4 c. water
2 eggs
Whisk ingredients together and spread into a greased 9x13 pan.
Peanut Butter Mixture
3/4 c. sugar
1/2 c. peanut butter
1/4 c. flour
2 eggs
Whisk ingredients together and put spoonfuls of mixture on top of brownie mixture.  Take a toothpick or a knife and swirl around til evenly spread.  (Or not so evenly, if that's what you like...)
Bake at 350 for 40 minutes. 
I drop the peanut butter in clumpsand then swirl with a toothpick below or use a knife
 
Related Posts Plugin for WordPress, Blogger...