Showing posts with label Gardening. Show all posts

October 28, 2015

Tomato Powder

Pin It


So, my friend that I mentioned in my previous post who harvested my cantaloupes for me while on vacation this past summer also picked my tomatoes for me too.  AND she made me tomato powder!  I had never even heard of doing this with tomatoes, and I think it is just brilliant!  

I made chili with it on Sunday and was amazed!  I didn't have any tomatoes, but had all the other ingredients so I thought I'd try it.  I used three or four tablespoons of tomato powder, and I had one can of RoTel and a tiny can of tomato paste, and made a very large pot of chili.  Seriously, why have I never known about this?  The tomato powder gave it a richer flavor almost like chili when you add cocoa powder to it if you've ever done that, it adds a depth of flavor. 

When I got back from vacation and learned about tomato powder I had to try making some myself.  However, I put my tomatoes in the oven overnight to dehydrate and may have slept in and when I asked my husband early in the morning to take them out of the oven, he just turned off the oven and left them in there.  So, needless to say I had some fire roasted tomatoes - some were pure charcoal...  But after a pep talk from my friend I sifted through the batch and was able to have a small bag full to turn into powder.   

Yesterday, I finally got around to turning them to powder along with a bag my friend gave me as well. So, after dehydrating the tomatoes, I put them in the freezer until they are brittle, and then they go through the food processor.  Some tutorials I read didn't put them in the freezer, but just let them cool.   
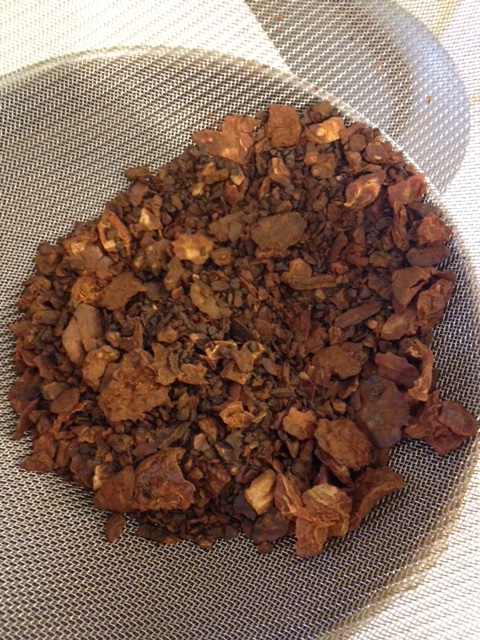
The dried tomatoes.  A lot of the tutorials I read their tomatoes are pretty and red, I think actually doing them in a dehydrator will be better, but we just used the oven giving them a more "fire roasted" flavor.  Next year, we'll use the dehydrator!

"Fire roasted" Tomato Powder

Both of my food processors are dying so they didn't quite pulverize everything, so I had to sift the powder out.  I just put these pieces back in a bag and in the freezer and next time I make chili, I'll just toss these in the pot!
I think the coolest thing I read about in the tutorials below is that you can actually make tomato powder from all the discarded tomato skins from when you make spaghetti sauce!  Get out of town!  Do you know how much tomato powder I could have from all the skins from the spaghetti sauce I made?  Oh well, now I know for next year!  And if this post puts you in the mood to make chili, HERE is a yummy recipe!

1.  How to dehydrate tomatoes

2.  DIY Tomato powder

3.  Tomato Powder

4.  Tomato Skins to Tomato Powder

October 27, 2015

My Running Reward Smoothie Recipe

Pin It


One thing I look forward to when I go running is the smoothie I'm going to eat (drink? slurp?) afterwards!  My two year old knows the routine as well and climbs to the table while I blend up a smoothie.  He loves that I share with him and I love that I get all his servings of fruit in his body in the morning!


I've never used a recipe for my smoothies, but I recently realized I've been making the same one these last few weeks, and thought I'd actually write it down for once!

I use mostly frozen fruit that I pick in the summer for my smoothies (the main reason I pick fruit actually!).  My smoothies are always different, sometimes I use Greek yogurt, kale, or add fruit juices.  Mostly 100% fresh fruit with a water or milk.  Our strawberries we do usually freeze with a little bit of sugar over them to keep them more fresh, but that's it.  Sometimes we freeze them whole, but we find the little syrup over them keeps them tasting better, and don't get frost bitten. 

When I went on vacation this summer I was actually sad to leave my garden because there was going to be so much to harvest while I was gone.  Luckily, I had a friend take care of it for me, and she went above and beyond and made it so I could enjoy these smoothies for months!

This was the second year I planted cantaloupes and boy did they just go gangbusters!

There are at least eight cantaloupe in this picture!!
She cut  or sliced them for me and froze them.  I was a little unsure how I was going to use them because honestly, I'm not a huge melon fan, and I had never really used them in smoothies.  I mostly grew them because my kids will eat them. But, that has since changed and I love them in my smoothies because it gives them a fresher taste.  Delicious!


Running Reward Smoothie Recipe

1 Banana
1 Apple, with peelings, sliced (I use Gala or Fuji)
1 c. water
6 large ice cubes
2 slices frozen cantaloupe
1 heaping cup of frozen strawberries (so more like 1 1/2 cups  - be generous)

Blend until smooth and enjoy!

August 27, 2012

My (true) Heirloom Tomatoes

My first true heirloom tomatoes!  I say true heirloom because my grandparents have raised the same kind of tomatoes forever from their own tomatoes seeds.  So, my Grandma gave me some of her seeds last year, I planted them this year and grew some of my own!! 

I think these are called yellow or orange Germans... I think...

Want to raise your own heirloom tomatoes?  Find a tomato you love from a farmers market or a friend's garden (my grandma says tomatoes from the grocery store won't work?), take some of the seeds, spread them out on a paper towel.  Let them dry, and then store in a zip lock bag in the freezer until next year when it's time to plant!  It's that easy!

These are some of my seeds for next year...

August 18, 2012

My first potatoes!!


Back in the spring my Grandma gave me some potatoes from her garden, but instead of eating them, I cut them up and planted them!!! 

This is my first potato crop!  How exciting is that???  They would be bigger had I ever put fertilizer on them, but even better with no fertilizer... 

I visited the garden where they are planted and I was so sad to see all my potato plants looking awful.  I called my dad and told him about it, and he laughed at me and said that meant they were ready to dig up!  There are still more to dig up, but they are still growing right now! 

Yay for gardening!  

May 14, 2012

Raised Garden Bed DIY

Last year, I had had enough of our horrible soil and decided to make some raised garden beds. I'm not really sure why I decided not to do wood, but I went with these edgers instead. 


My husband has worked for landscapers twice in his life, but this was all my project (actually, like most outdoor projects...)

I started building it, and then John came out and said I was doing it wrong, and took over. (No problem here, then I could take pictures...)

We dug a rectangle just a little bit in the ground and laid out our first layer of edgers.


John hammered on top of a piece of wood to make sure the edgers were in good, and to help make them level. 
After adding each new edger, we used a level to make sure it was even with the one before
We made sure it was straight all the way down.

We then used liquid nails to add the next layer of edgers to make it two tall.

Three mistakes I made:

1.  I wasn't patient, and didn't wait for the liquid nails to dry before filling it with soil, so it put pressure on some of the seams causing them to dry a little crooked...

2.  We didn't mulch around it that day like we should have, so we got rain and the clay stained our edgers.  The mulch could have prevented that.

3.  I glued one edger upside down, and the bottom doesn't have a nice finish like the top, oh well...

This was the beginiing of the garden last year.  Cilantro that I transplanted from the old garden, and you can see my green onions that did great from me planting a rotten onion out of my pantry. 


Last year, was the first year that our garden was awesome!  It's all about the soil, and ours stunk before the raised beds!! 

If we can do it, you can too...  So fun!!
Related Posts Plugin for WordPress, Blogger...